How To Create Video Storyboard: Step-By-Step Guide

Vismaya Babu
Last Updated: 23 April 2024
9 min read

Ever watched a movie or a TV show and marveled at how seamlessly everything flowed from one scene to the next? Each scene draws you deeper into the story until you’re completely immersed in the world created by the filmmaker.
That’s the magic of a well-crafted storyboard at work.
In this comprehensive guide, we will be diving deep into the art form that is a great video storyboard, from the benefits to how you can create one for your videos. But let’s start with the basics.
What is storyboard
A storyboard is like the blueprint of your video project that helps you plan and organize your shots pre-production or before filming begins.
Ideally, it should detail the visual elements, camera angles, dialogue, character actions, and transitions in chronological order to bring the story to life on screen.

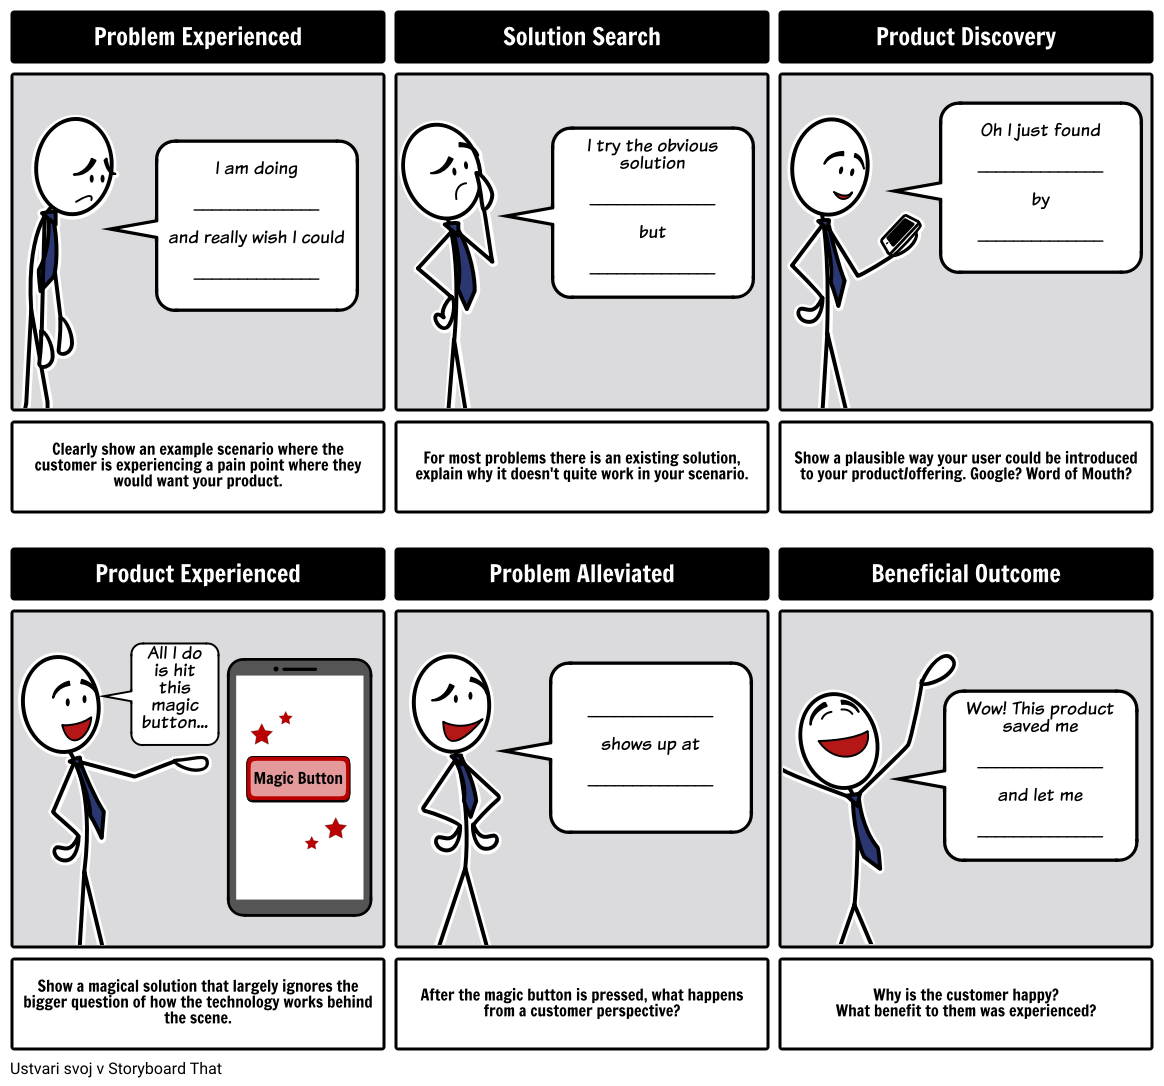
A finished storyboard, as shown above, will look like a comic strip or a graphic novel.
3 Benefits of utilizing a storyboard
Storyboarding offers numerous advantages throughout the video production process. Here are three compelling benefits of incorporating storyboards into your workflow:
1. Visualizing the concept
You’ve probably found yourself in that embarrassing situation where trying to explain your video idea ended in a tangled mess of words and a genuinely confused audience.
With a storyboard, you can visually articulate your vision in a way that words alone cannot match. By sketching out each scene, including key elements such as characters, settings, and props, you easily bridge the gap between imagination and reality.
2. Communication tool
Storyboards provide a common visual language that transcends linguistic and cultural barriers, ensuring that everyone involved in the project gets the vision and intent.
Additionally, unlike words which can be ambiguous, pictures are concrete and less likely to be misinterpreted. Whatever, is on the storyboard is what each team member will see. Therefore, everyone will be well aligned on the desired outcome from the word go, which boosts engagement and productivity.
3. Saves time and resources
By meticulously planning each shot in advance, storyboards help streamline the video shooting process.
You can easily identify potential issues and troubleshoot solutions before the cameras start rolling. This helps you minimize time wastage on set and the need for costly reshoots.
Great tip: Use a great screen recorder to have a visual of the scenes with issues, instead of writing them down and having to constantly refer to the storyboard.
Besides troubleshooting, storyboarding will also help you optimize resource allocation by identifying which scenes require specific props, locations, or equipment beforehand. This allows for more efficient budgeting and scheduling.
Exploring the 3 types of storyboards
Storyboards come in various forms, each offering its own unique advantages and applications. Let’s delve into the three primary types of storyboards:
1. Traditional storyboard
The traditional storyboard is the classic approach to visualizing a film or video project. Typically hand-drawn on paper or created digitally using drawing software, traditional storyboards consist of a series of sketches or illustrations that depict each shot or scene in sequential order.

While traditional storyboards require artistic skill and time to create, they offer a personal touch and allow for greater creativity and customization in the story’s visual representation.
The personal touch can help enhance your storyboard’s emotional resonance and foster a deeper connection between the viewer and the narrative.
2. Thumbnail
Thumbnail storyboards are a more simplified version of traditional storyboards. Instead of detailed sketches, thumbnail storyboards feature small-scale, quick sketches or stick-figure drawings that provide a basic overview of each shot or scene.

This storyboarding process relies more on images than text, meaning there are minimal annotations or notes. Therefore, your sketches will need to be more detailed.
However, their simplified nature makes them ideal for quickly brainstorming ideas and exploring different visual concepts before committing to more detailed planning.
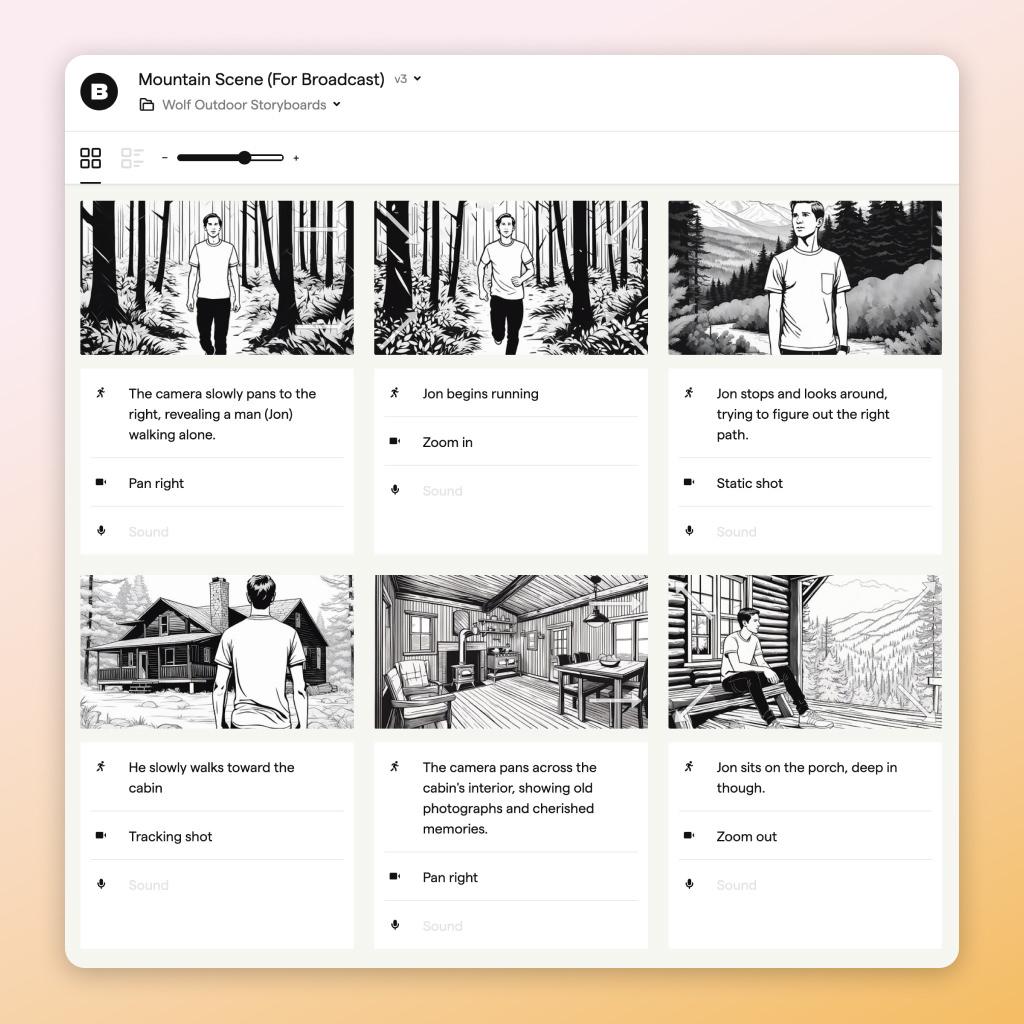
3. Digital
Many filmmakers and video creators today opt to use the digital storyboarding process due to its efficiency. Digital storyboards are highly versatile and customizable, making it easy to experiment with different visual styles, compositions, and effects.

These storyboards can be easily shared, edited, and revised, facilitating seamless collaboration among team members and stakeholders throughout the production process.

Besides that, you can access your digital storyboard anytime, anywhere, using an internet-enabled device. This makes them ideal for remote teams.
You can use specialized storyboard software like Boords and Storyboarder to quickly create detailed storyboards. Most offer great video storyboard templates you can use.
How to create a professional storyboard for your video
We have already established that crafting a professional video storyboard is essential. But how do you go about creating one? Here’s a comprehensive guide on how to create a storyboard that captures the essence of your project:
a) Plan out your video
Before diving into the storyboard creation process, take the time to thoroughly plan out your video.
Start by clarifying the purpose and objectives of your video. What message do you want to convey? Who is your target audience? What action do you want viewers to take after watching the video? By clearly defining your goals upfront, you can ensure that your video remains focused and impactful throughout the production process.
Every great video starts with a compelling story. So develop a storyline that captivates viewers from beginning to end, taking them on a journey that evokes emotion, curiosity, and empathy. Whether it’s an educational tutorial or a promotional advertisement, ensure your storyline is well-structured, engaging, and relevant to your target audience.
Once you have a solid storyline, it’s time to translate it into a script. Write a script that effectively communicates your message. Ensure you outline the storyline, including major plot points, character arcs, and thematic elements.
b) Translate your script into a visual narrative
With your plan all rolled out, it’s time to translate your script into a visual narrative.
Begin by breaking down the script into individual shots or sequences. Identify the key elements of each scene, including the setting, characters involved, actions taken, and any dialogue or important visual cues.
For each scene, visualize the actions and events described in the script. Imagine how the scene will unfold in the finished video, considering factors such as camera angles, framing, composition, and movement.
Then go ahead and start sketching out your scenes. Focus on conveying the basic elements of the scene, such as character placement, camera angle, and key visual elements. Remember you don’t have to be the best artist to execute this part, you can easily use storyboard software.
c) Integrate your script into the storyboard
As you sketch out each shot, integrate the scripted dialogue, action, and descriptions into the storyboard panels. Use speech bubbles, captions, or annotations to indicate character dialogue, sound effects, movements, and any other relevant information. You can use a generative AI platform to get great dialogues and caption ideas.
Also, consider the environmental details described in the script, such as the setting, props, and atmospheric elements. Depict these details in the storyboard panels, ensuring the visual elements accurately reflect each scene’s tone, mood, and atmosphere. Use lighting, color, texture, and visual symbolism to create a rich, immersive visual world that enhances the storytelling experience.
Above all, ensure the storyboard panels maintain a great flow, with each scene leading logically and seamlessly into the next.
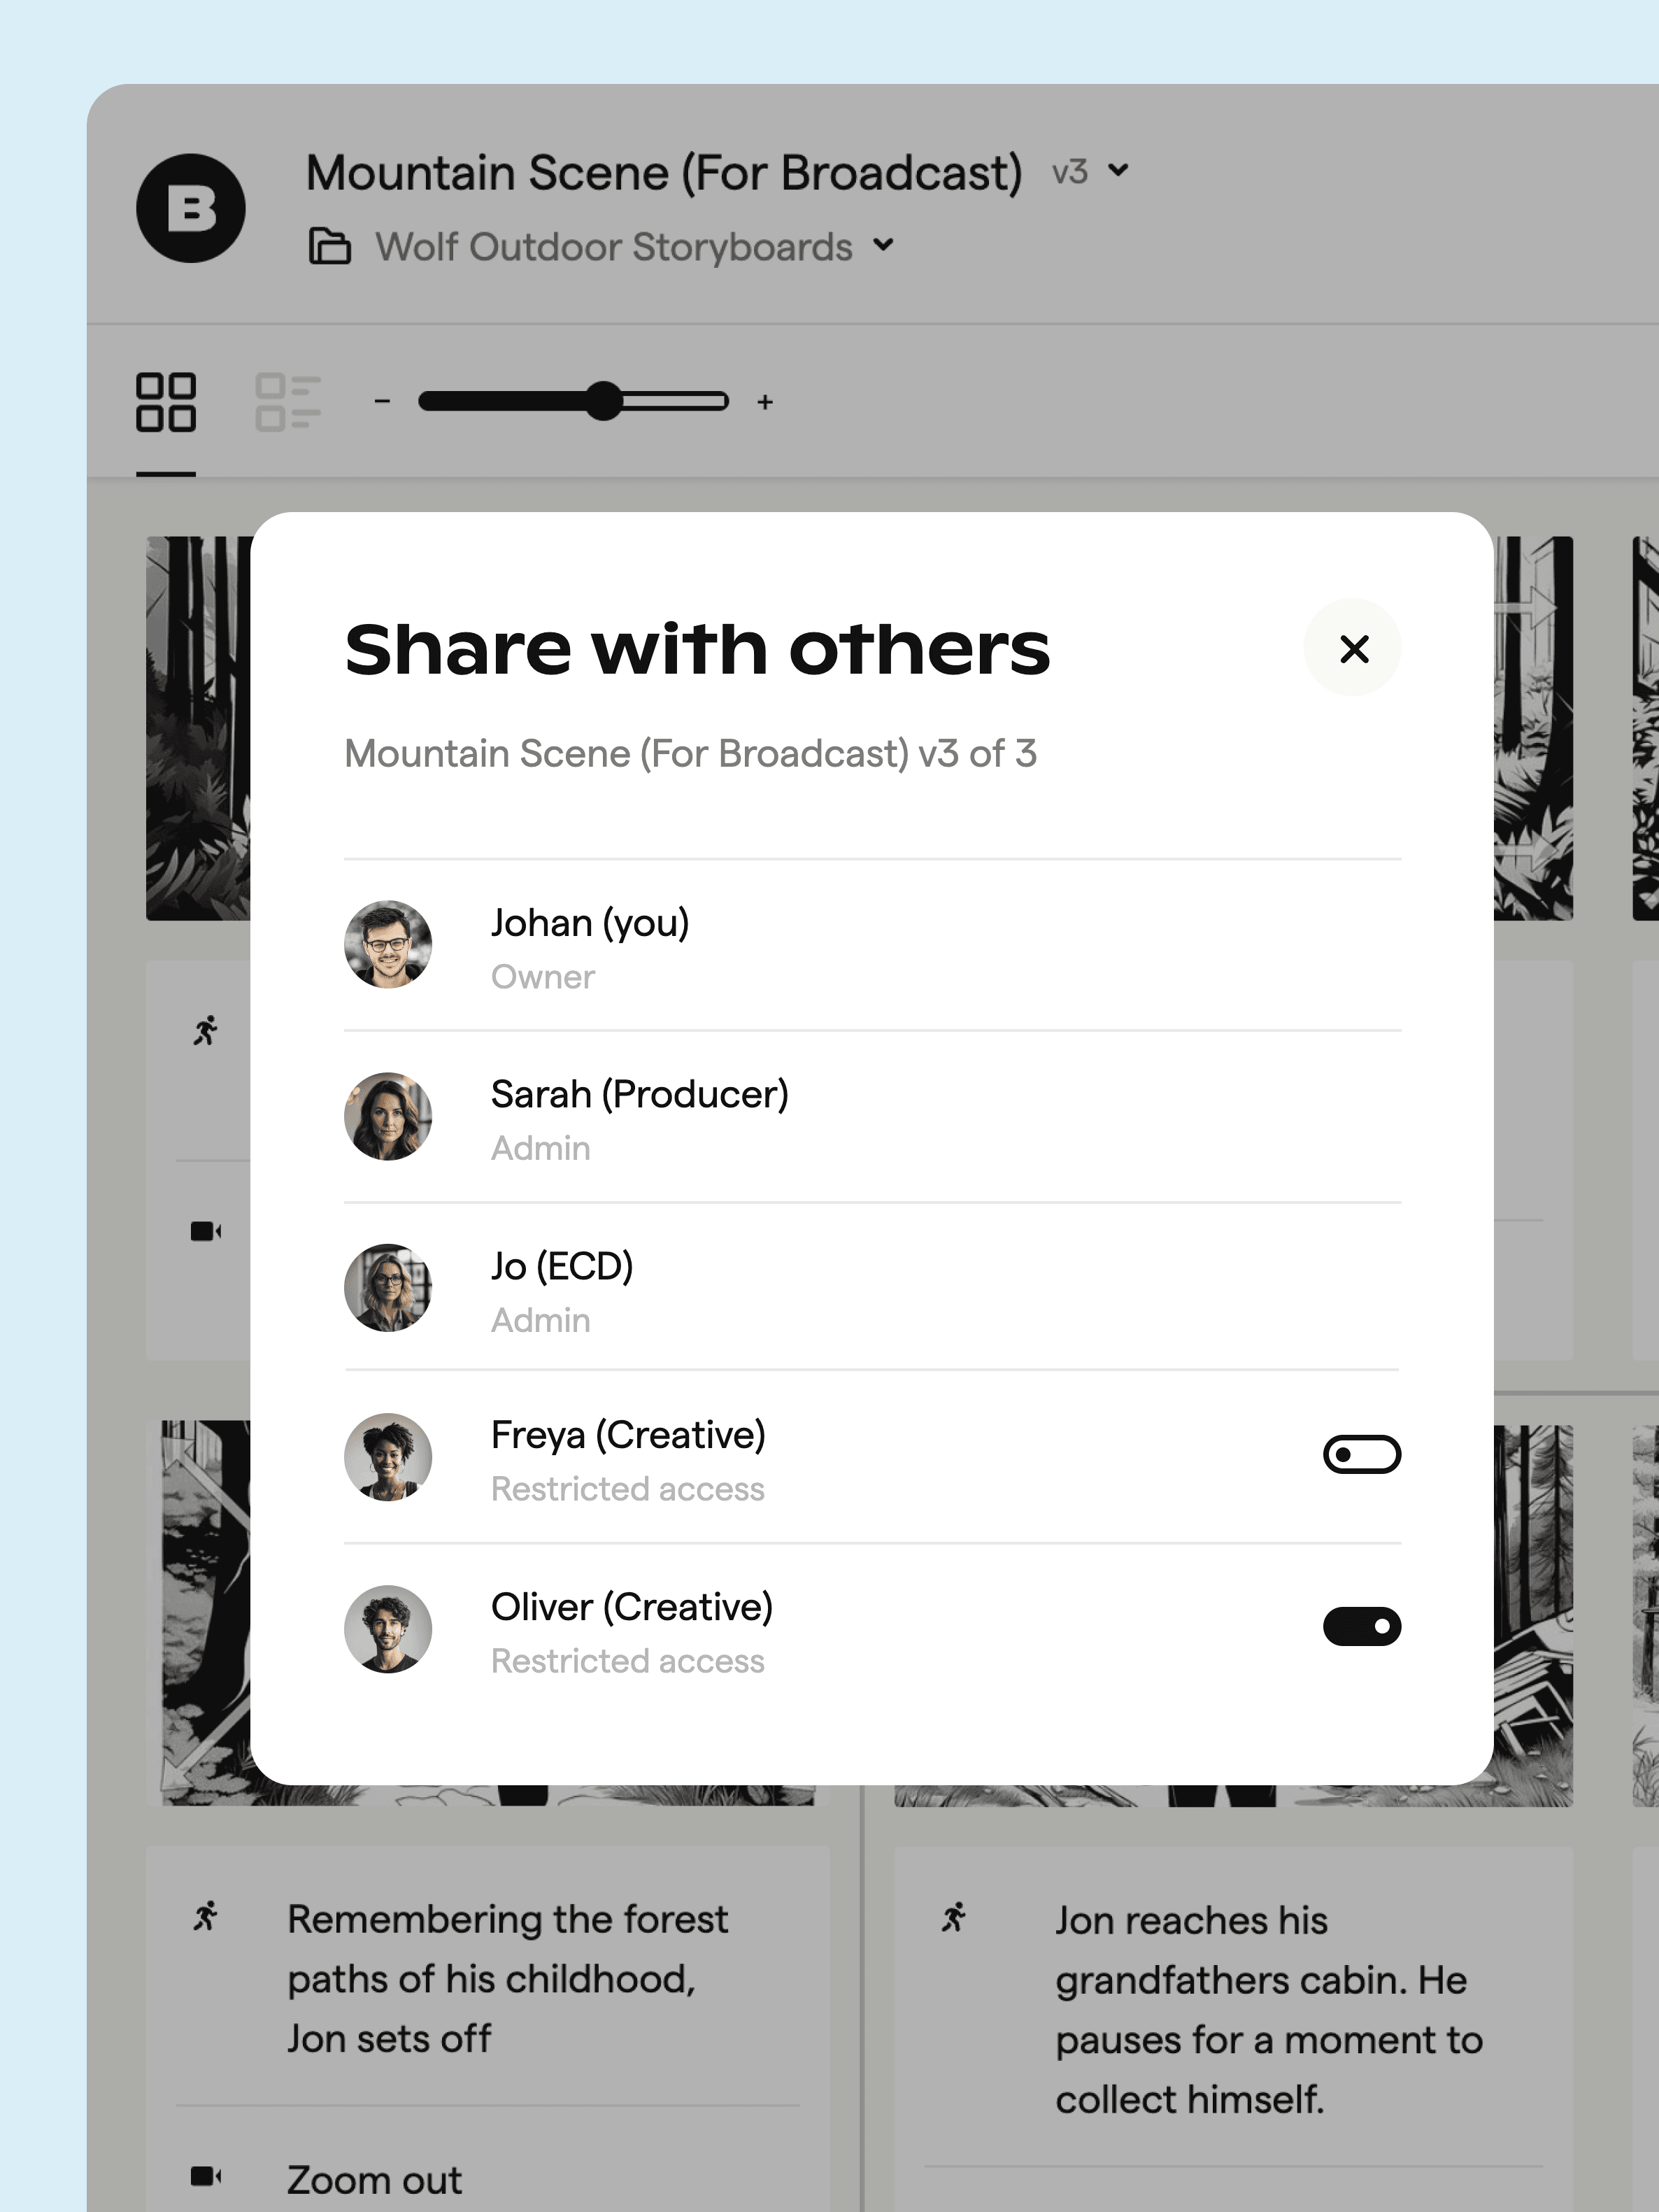
d) Collaborate with your team to review and refine
Like the video production journey, storyboarding is a collaborative process. So don’t hesitate to seek feedback from your team members.
Share your storyboard with the director, cinematographer, production designer, and other key stakeholders, and solicit their input. Then pay attention to the feedback and make necessary revisions to improve the storyboard’s clarity and effectiveness.
Aim for a collaborative and iterative approach to storyboard development. This approach requires refining the storyboard through multiple rounds of feedback and revision until everyone is satisfied with the final result.
Conclusion
A great video storyboard is an invaluable tool for bringing your video ideas to life and creating a roadmap that guides your entire video production process.
By following the steps we’ve outlined, you can create a video storyboard that communicates your vision effectively. Start by planning out your video content, translate your script into a visual narrative, integrate your script into the storyboard, and finally collaborate with your team to refine your storyboard.
Go ahead and grab your pencil (or digital stylus) and start sketching out your next masterpiece!
Vismaya Babu
Lead SEO specialist at SurveySparrow
Marketing whiz and tech lover, always exploring the digital world with curiosity and creativity!


Turn every feedback into a growth opportunity
14-day free trial • Cancel Anytime • No Credit Card Required • Need a Demo?